 Skip to content
Hey there, friend. Are you tired of that dreaded single bar of signal? Fed up with dropped calls, sluggish downloads, and WiFi that just won’t reach the back of the house? I’ve been there, and it’s incredibly frustrating. In our hyper-connected world, a weak signal can feel like being stranded on a digital island.
But here’s a little secret the big carriers and internet providers don’t always shout about: the key to rock-solid connectivity often isn’t about paying for a more expensive plan. It’s about your antenna. More specifically, it’s all about where and how you mount that antenna.
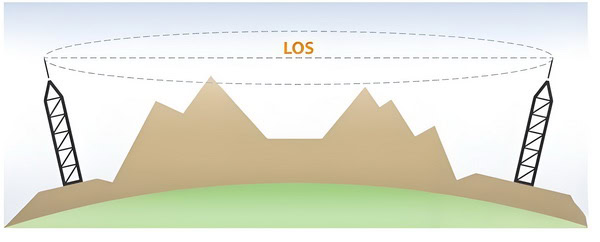
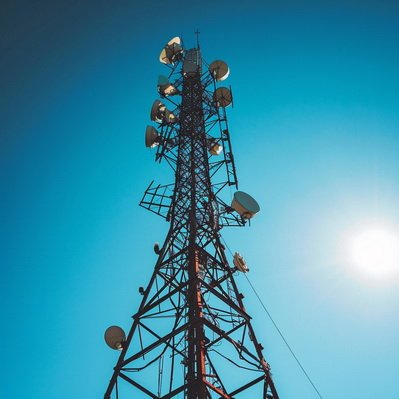
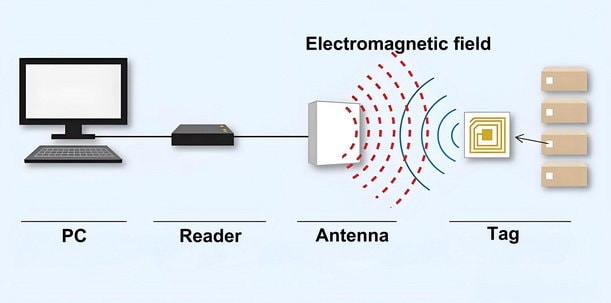
To ensure optimal signal performance for wireless applications—including 4G/5G, WiFi, RFID, IoT, and others—it’s best to mount the antenna as high as possible, with a clear, unobstructed line of sight to the signal source (such as a base station, repeater, access point, or reader). Additionally, minimizing cable length and using high-quality, low-loss cables are essential for maintaining strong signal integrity across all types of wireless systems.
But here’s a crucial tip: don’t get carried away with putting as much distance as possible between your antennas just for the sake of it. While spacing them out can help reduce interference and improve overall system performance, all cables introduce signal loss—and the longer the cable run, the more your precious signal fades away before it even reaches your device. Even the best low-loss cable isn’t immune to physics!
Pro tip: When planning your antenna setup, try to reduce cable length wherever possible—even if it means taking the extra time to drill through a wall or floor for a more direct route. Many professional kits come with specially selected low-loss cable, and some even allow you to upgrade further for top-notch performance. Always remember: smart placement and short, high-quality cables are the secret sauce for a strong, reliable connection.
Ready to dive deeper and say goodbye to buffering for good? Let’s get into the nitty-gritty of antenna mounting and placement. Believe me, with a little know-how, you can transform your connection from frustratingly slow to fantastically fast.
Why Proper Antenna Placement is a Game Changer
Think of your wireless signal as a conversation. If you and a friend are trying to talk in a crowded, noisy room with walls between you, you’ll have to shout, and you still might miss half of what the other is saying. Move into a quiet, open space, and the conversation is effortless.
The same exact principle applies to the radio frequency (RF) signals your devices use. The goal is to give your antenna the cleanest, most direct path possible to the source, whether that’s a distant cell tower, your home WiFi router, your home signal booster or an IoT gateway.
The Science of Signal Loss (The Simple Version)
RF signals, like those for 4G, 5G, and WiFi, are powerful, but they’re not unstoppable. They travel in waves, and just like light, they can be blocked, reflected, and absorbed by things in their path. This is a phenomenon we call “signal attenuation” or “path loss.”

Here are the most common signal-killing culprits you’re up against:
- Building Materials:This is the big one for indoor coverage. Concrete, brick, metal siding, and even energy-efficient Low-E glass are notorious signal blockers. That beautiful brick exterior might look great, but it could be a fortress against good reception.
- Terrain and Trees: Hills, valleys, and dense foliage can easily absorb or block the path between your antenna and the cell tower. Water in leaves is particularly good at absorbing RF energy, which is why your signal might even get worse in the summer when trees are in full bloom.
- Distance: This one’s pretty intuitive. The farther your antenna is from the signal source, the weaker the signal will be when it arrives. It’s like a flashlight beam that gets dimmer the farther away it gets.
- Multipath Interference: In cities and even inside your own home, signals don’t just travel in a straight line. They bounce off buildings, walls, and metal objects, creating multiple echoes of the original signal. When these echoes arrive at your antenna out of sync, they can confuse your receiver and corrupt the data, leading to slow speeds and dropped connections.
The goal of proper antenna placement is simple: get your antenna high enough and in a clear enough spot to overcome these obstacles and catch the strongest, cleanest signal possible.
Understanding Antenna Gain: The Key to Better Signal Strength
cURL Too many subrequests by single Worker invocation. To configure this limit, refer to https://developers.cloudflare.com/workers/wrangler/configuration/#limits.
cURL Too many subrequests by single Worker invocation. To configure this limit, refer to https://developers.cloudflare.com/workers/wrangler/configuration/#limits.
cURL Too many subrequests by single Worker invocation. To configure this limit, refer to https://developers.cloudflare.com/workers/wrangler/configuration/#limits.
cURL Too many subrequests by single Worker invocation. To configure this limit, refer to https://developers.cloudflare.com/workers/wrangler/configuration/#limits
cURL Too many subrequests by single Worker invocation. To configure this limit, refer to https://developers.cloudflare.com/workers/wrangler/configuration/#limits antennacURL Too many subrequests by single Worker invocation. To configure this limit, refer to https://developers.cloudflare.com/workers/wrangler/configuration/#limits
cURL Too many subrequests by single Worker invocation. To configure this limit, refer to https://developers.cloudflare.com/workers/wrangler/configuration/#limits
cURL Too many subrequests by single Worker invocation. To configure this limit, refer to https://developers.cloudflare.com/workers/wrangler/configuration/#limits cURL Too many subrequests by single Worker invocation. To configure this limit, refer to https://developers.cloudflare.com/workers/wrangler/configuration/#limitscURL Too many subrequests by single Worker invocation. To configure this limit, refer to https://developers.cloudflare.com/workers/wrangler/configuration/#limits.
Pros:
- cURL Too many subrequests by single Worker invocation. To configure this limit, refer to https://developers.cloudflare.com/workers/wrangler/configuration/#limits cURL Too many subrequests by single Worker invocation. To configure this limit, refer to https://developers.cloudflare.com/workers/wrangler/configuration/#limits.
- cURL Too many subrequests by single Worker invocation. To configure this limit, refer to https://developers.cloudflare.com/workers/wrangler/configuration/#limits cURL Too many subrequests by single Worker invocation. To configure this limit, refer to https://developers.cloudflare.com/workers/wrangler/configuration/#limits.
- cURL Too many subrequests by single Worker invocation. To configure this limit, refer to https://developers.cloudflare.com/workers/wrangler/configuration/#limits cURL Too many subrequests by single Worker invocation. To configure this limit, refer to https://developers.cloudflare.com/workers/wrangler/configuration/#limits.
Cons:
- cURL Too many subrequests by single Worker invocation. To configure this limit, refer to https://developers.cloudflare.com/workers/wrangler/configuration/#limits cURL Too many subrequests by single Worker invocation. To configure this limit, refer to https://developers.cloudflare.com/workers/wrangler/configuration/#limits.

- cURL Too many subrequests by single Worker invocation. To configure this limit, refer to https://developers.cloudflare.com/workers/wrangler/configuration/#limitscURL Too many subrequests by single Worker invocation. To configure this limit, refer to https://developers.cloudflare.com/workers/wrangler/configuration/#limits.
- cURL Too many subrequests by single Worker invocation. To configure this limit, refer to https://developers.cloudflare.com/workers/wrangler/configuration/#limits While the FCC’s OTARD (Over-the-Air Reception Devices) Rule offers some protection, your Homeowners’ Association may still have rules about where and how you can mount an external antenna.
Using Multiple Yagi Antennas: Double Coverage, Double Caution
Sometimes, a single antenna just isn’t enough—especially if you’re sandwiched between cell towers sending signals from opposite directions, or want to blanket your property with reliable coverage. In these situations, yes, you can absolutely deploy more than one yagi antenna to give yourself a fighting chance.
But there’s a catch: placement is everything. Here’s how to do it without inviting unwanted interference (or what tech folks call “oscillation”—basically, your antennas getting into a shouting match with each other):
- Separation Matters: Keep each yagi antenna at least 10 feet apart. This generous spacing helps avoid unwanted feedback loops.
- Point in Different Directions: Make sure the antennas aren’t aimed at each other. Each one should target a different tower or signal source.
- Use a Signal Splitter: The cables from the antennas will meet at a signal splitter, which then connects to your signal amplifier inside.
By following these steps, you’ll boost your chances of robust, stable coverage—without turning your signal boost project into a static-filled disaster. And if you run into a snag, don’t be shy about calling in a pro or getting advice from seasoned radio enthusiasts in forums like Reddit’s r/amateurradio or resources from antenna experts at Sanny Telecom.
Indoor Placement: For In-Building Enhancement
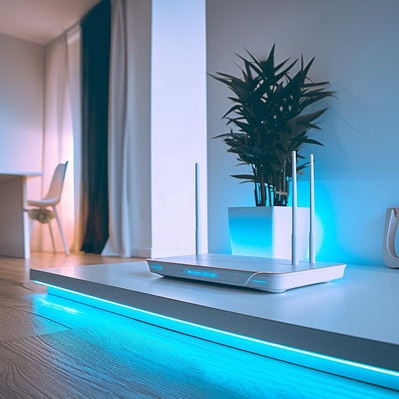
Sometimes, the signal outside is great, but it just dies the second you walk indoors. This is where indoor antennas come into play, primarily for WiFi networks and the indoor broadcast antennas of cellular signal boosters.
Pros:
- Easy to Install: Setting up a WiFi router or an indoor cellular antenna is typically a plug-and-play affair.
- Targeted Coverage: You can place them strategically to cover specific dead zones in your home or office.
- Aesthetically Pleasing: Most indoor antennas are designed to be discreet and blend in with your decor.
Cons:
- Limited by Building Materials: Performance is still at the mercy of interior walls, floors, and furniture.
- Prone to Interference: They have to compete with a sea of other electronic signals from things like microwaves, cordless phones, and Bluetooth devices.
- Doesn’t Create a Signal: This is key! An indoor antenna can only redistribute a signal that’s already there. If there’s no signal to begin with, an indoor antenna won’t magically create it.
What Factors Affect Indoor Antenna Range and Performance?
So, what really determines how much coverage you’ll get from your indoor antenna? There are a few key ingredients in this recipe:
- Obstacles & Layout: Thick walls, metal doors, and even large furniture can interfere with signal propagation. Open layouts win the coverage game, while dense building materials (concrete, brick, metal) slow you down.
- Booster Output Power: The muscle behind your system matters! The higher the power your signal booster provides, the larger the effective coverage area indoors.
- Strength of Incoming Signal: Remember, your indoor antenna is only as good as the signal it’s fed by your outdoor antenna. If your outdoor antenna barely pulls in a signal, the inside coverage will be limited no matter how perfect your placement.
Paying attention to these factors can make the difference between whole-house connectivity and a single-room dead zone.
Finding the Sweet Spot: A Step-by-Step Guide to Locating the Best Signal
Alright, you’ve decided on a general strategy. Now it’s time to become a signal detective and pinpoint the absolute best location for your antenna. Don’t skip this part! A little testing now will save you a world of headaches later.
Step 1: Locate Your Signal Source
Before you can aim your antenna, you need to know what you’re aiming at.
cURL Too many subrequests by single Worker invocation. To configure this limit, refer to https://developers.cloudflare.com/workers/wrangler/configuration/#limits cURL Too many subrequests by single Worker invocation. To configure this limit, refer to https://developers.cloudflare.com/workers/wrangler/configuration/#limits.
cURL Too many subrequests by single Worker invocation. To configure this limit, refer to https://developers.cloudflare.com/workers/wrangler/configuration/#limits cURL Too many subrequests by single Worker invocation. To configure this limit, refer to https://developers.cloudflare.com/workers/wrangler/configuration/#limits.
cURL Too many subrequests by single Worker invocation. To configure this limit, refer to https://developers.cloudflare.com/workers/wrangler/configuration/#limits cURL Too many subrequests by single Worker invocation. To configure this limit, refer to https://developers.cloudflare.com/workers/wrangler/configuration/#limits.
cURL Too many subrequests by single Worker invocation. To configure this limit, refer to https://developers.cloudflare.com/workers/wrangler/configuration/#limits cURL Too many subrequests by single Worker invocation. To configure this limit, refer to https://developers.cloudflare.com/workers/wrangler/configuration/#limits antenna, cURL Too many subrequests by single Worker invocation. To configure this limit, refer to https://developers.cloudflare.com/workers/wrangler/configuration/#limits.
cURL Too many subrequests by single Worker invocation. To configure this limit, refer to https://developers.cloudflare.com/workers/wrangler/configuration/#limits cURL Too many subrequests by single Worker invocation. To configure this limit, refer to https://developers.cloudflare.com/workers/wrangler/configuration/#limits cURL Too many subrequests by single Worker invocation. To configure this limit, refer to https://developers.cloudflare.com/workers/wrangler/configuration/#limits or cURL Too many subrequests by single Worker invocation. To configure this limit, refer to https://developers.cloudflare.com/workers/wrangler/configuration/#limitscURL Too many subrequests by single Worker invocation. To configure this limit, refer to https://developers.cloudflare.com/workers/wrangler/configuration/#limits.
cURL Too many subrequests by single Worker invocation. To configure this limit, refer to https://developers.cloudflare.com/workers/wrangler/configuration/#limits
cURL Too many subrequests by single Worker invocation. To configure this limit, refer to https://developers.cloudflare.com/workers/wrangler/configuration/#limits“
cURL Too many subrequests by single Worker invocation. To configure this limit, refer to https://developers.cloudflare.com/workers/wrangler/configuration/#limits
cURL Too many subrequests by single Worker invocation. To configure this limit, refer to https://developers.cloudflare.com/workers/wrangler/configuration/#limits.
cURL Too many subrequests by single Worker invocation. To configure this limit, refer to https://developers.cloudflare.com/workers/wrangler/configuration/#limits.
cURL Too many subrequests by single Worker invocation. To configure this limit, refer to https://developers.cloudflare.com/workers/wrangler/configuration/#limits.
cURL Too many subrequests by single Worker invocation. To configure this limit, refer to https://developers.cloudflare.com/workers/wrangler/configuration/#limits.
6. Mark the Spot: Once you’ve found the undisputed sweet spot, mark it. That’s where you’ll do your permanent installation.
Hands Off! Why You Shouldn’t Touch the Antenna During Testing
Here’s a quirky but crucial bit most people miss: when you’re testing signal strength with your new outdoor antenna, keep your paws off the metal parts! Why? Because your body actually acts like a giant soggy antenna itself—full of water and minerals—which can absorb or reflect radio waves. The moment you touch the antenna (especially those with exposed metal), you’re throwing off its readings, making it impossible to know if the signal is truly solid or just looking better because of your accidental “human boost.”
For the best results, always stand back and leave the antenna untouched while you run your tests—think of yourself as the scientist, not part of the experiment. This simple habit ensures that the signal strength readings you get are accurate, so when you lock in that antenna’s position, you’re capturing the real, unfiltered signal for your amplifier or receiver.
The Nitty-Gritty of Outdoor Antenna Mounting
If you’ve determined that an outdoor antenna is the path to digital bliss, it’s time to tool up. Remember, safety is your number one priority. If you are not 100% confident working on a ladder or your roof, please hire a professional. It’s not worth the risk.
Tools and Materials You’ll Need:
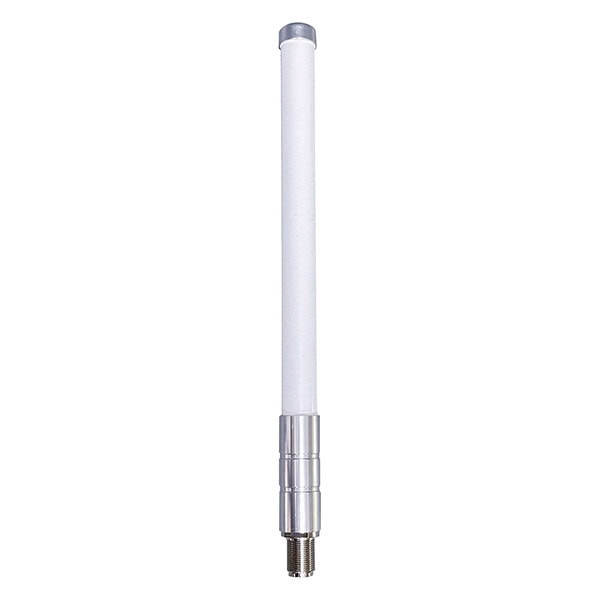
- Directional (Yagi) or Omni-Directional Antenna
- Mounting Pole (Mast) and a J-Mount or Pole Mount bracket

- Low-Loss cURL Too many subrequests by single Worker invocation. To configure this limit, refer to https://developers.cloudflare.com/workers/wrangler/configuration/#limits (LMR-195 is a great standard)

- Power Drill, Wrenches, and Screwdrivers
- Ladder (non-metallic material)
- Signal Meter or Smartphone in Field Test Mode
- Level & Compass
- Coax Sealant Tape or Weatherproof Sealant
- Grounding Wire (10 AWG Copper), Grounding Block, and Grounding Rod
A Critical Word on Safety
POWER LINES ARE A NO-GO: This is not a suggestion, it’s a rule. Maintain a distance of at least twice the length of your antenna and mast assembly from any power lines. If a mast falls and hits a power line, it can be fatal.
Stay Well Away: The distance between any power lines and the installation site should be at least one and one-half times the height of the antenna and mast assembly. Make the distance even greater, if at all possible. Since all overhead power lines look somewhat alike, consider them all dangerous and stay well away from them.
Work with a Buddy: Never work on a roof or a tall ladder alone. A spotter can stabilize the ladder and be there in case of an emergency.
Check weather conditions: Be sure that the area is not slippery and make sure that rain or thunderstorms are not predicted for the day you install the antenna.
The wind can blow the antenna into a nearby power line. Don’t install, adjust or move antennas in moderate or heavy winds.
Stay Alert: Antennas and Power Lines Are a Deadly Mix
Keep Well Clear: Never attempt to install, adjust, or move an antenna anywhere near overhead wires. Even with safety features, antennas cannot guarantee your protection from electric shock. Should the antenna come close to or touch a power line, let go immediately, move away from the area, and contact your utility company right away. Always treat every overhead wire as dangerous—do not take chances.
Mounting Your Outdoor Antenna: A Step-by-Step Guide
1. Assemble on the Ground: Build the full antenna and mast assembly on the ground. It’s much easier and safer.
2. Install the Mount: Securely attach the mounting bracket to a sturdy surface like the fascia, eave, or a gable end. A J-mount is perfect for this. Ensure it’s plumb and the bolts are driven into solid wood.
3. Raise and Attach the Mast: Carefully raise the assembly and secure the mast to the mount. Don’t fully tighten the bolts just yet.
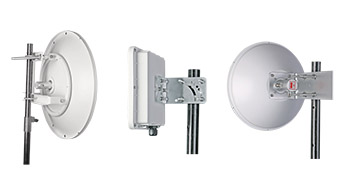
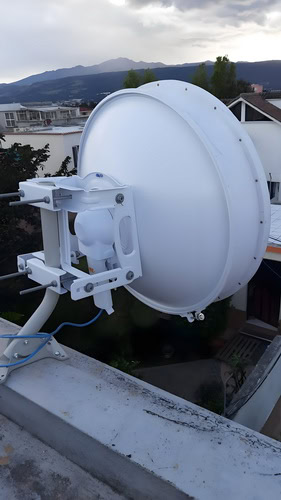
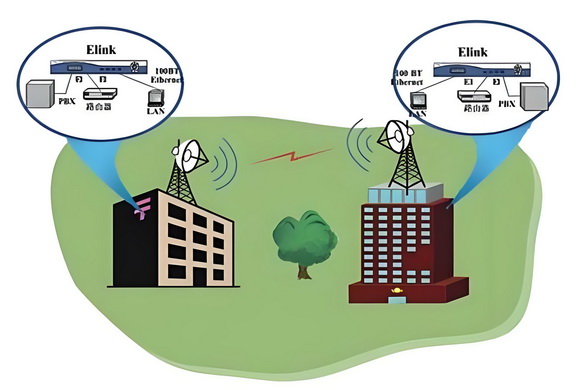
4. Aim the Antenna: Using the signal readings from your testing phase, carefully align the antenna toward the cell tower or your target location. For directional antennas—such as Yagi, parabolic, or panel antennas—which are commonly used for point-to-point links or CCTV applications, precise aiming is essential for the best performance.
cURL Too many subrequests by single Worker invocation. To configure this limit, refer to https://developers.cloudflare.com/workers/wrangler/configuration/#limits
cURL Too many subrequests by single Worker invocation. To configure this limit, refer to https://developers.cloudflare.com/workers/wrangler/configuration/#limits.
cURL Too many subrequests by single Worker invocation. To configure this limit, refer to https://developers.cloudflare.com/workers/wrangler/configuration/#limits
- cURL Too many subrequests by single Worker invocation. To configure this limit, refer to https://developers.cloudflare.com/workers/wrangler/configuration/#limits.
- cURL Too many subrequests by single Worker invocation. To configure this limit, refer to https://developers.cloudflare.com/workers/wrangler/configuration/#limits.
- cURL Too many subrequests by single Worker invocation. To configure this limit, refer to https://developers.cloudflare.com/workers/wrangler/configuration/#limits.
cURL Too many subrequests by single Worker invocation. To configure this limit, refer to https://developers.cloudflare.com/workers/wrangler/configuration/#limits.
cURL Too many subrequests by single Worker invocation. To configure this limit, refer to https://developers.cloudflare.com/workers/wrangler/configuration/#limits.
cURL Too many subrequests by single Worker invocation. To configure this limit, refer to https://developers.cloudflare.com/workers/wrangler/configuration/#limits.
cURL Too many subrequests by single Worker invocation. To configure this limit, refer to https://developers.cloudflare.com/workers/wrangler/configuration/#limits
cURL Too many subrequests by single Worker invocation. To configure this limit, refer to https://developers.cloudflare.com/workers/wrangler/configuration/#limits cURL Too many subrequests by single Worker invocation. To configure this limit, refer to https://developers.cloudflare.com/workers/wrangler/configuration/#limits.
cURL Too many subrequests by single Worker invocation. To configure this limit, refer to https://developers.cloudflare.com/workers/wrangler/configuration/#limits.
cURL Too many subrequests by single Worker invocation. To configure this limit, refer to https://developers.cloudflare.com/workers/wrangler/configuration/#limits
cURL Too many subrequests by single Worker invocation. To configure this limit, refer to https://developers.cloudflare.com/workers/wrangler/configuration/#limits cURL Too many subrequests by single Worker invocation. To configure this limit, refer to https://developers.cloudflare.com/workers/wrangler/configuration/#limits.

cURL Too many subrequests by single Worker invocation. To configure this limit, refer to https://developers.cloudflare.com/workers/wrangler/configuration/#limits
If you’re installing a cellular signal booster, the placement of the “indoor” antenna is just as important as the outdoor one.
Maximize Separation: You need to create as much vertical and horizontal distance as possible between the outdoor (donor) antenna and the indoor (broadcast) antenna. If they are too close, they can create a feedback loop called oscillation, which will cause the booster to shut down.
Target Your Dead Zone: Place the indoor panel or dome antenna in the area where you need the signal the most. A panel antenna is directional, so you can aim it down a hallway or across a large room. A dome antenna is omni-directional, perfect for a central area on a single floor.
Consider Your Building Layout: The best spot for your indoor antenna often depends on your building’s layout and the area you want covered. If you’re just looking to improve signal in a single room—like a home office—installing the antenna in the middle of the ceiling delivers even coverage. For coverage across multiple floors, a directional antenna attached to the ceiling in the center of your desired coverage area works best.
In some unique cases, such as long, narrow corridors, mounting a directional panel antenna on the wall can help the signal reach further down the hallway. Always tailor placement to the specific needs of your space for optimal results.
Finding the Right Antenna Separation for Your Booster Kit
Not sure how far apart your booster antennas need to be? The answer is usually right at your fingertips. Every booster kit comes with an installation guide or manual—either in the box or available for download from the manufacturer’s website (think SureCall, weBoost, Cel-Fi, or Wilson Electronics). These instructions will outline the exact minimum separation needed for your specific model, based on its amplifier gain. Always check the manual before you drill any holes—getting this step right ensures your system performs at its peak and avoids annoying shutdowns.
Advanced Customization: Tailoring Your Repeater Kit for the Toughest Challenges
Sometimes, the standard repeater kit just isn’t enough—perhaps you’ve got a tricky layout, thick concrete walls, or your home doubles as a Faraday cage (lucky you). The good news? You can absolutely fine-tune your setup to meet even the most unique or stubborn signal problems.
Mix and Match Antenna Types:
If your biggest obstacle is distance from the cell tower or major obstructions, consider swapping the included outdoor antenna for a high-gain directional Yagi or even a parabolic grid antenna. These specialized options—like those from Wilson Electronics or SureCall—focus signal strength in one direction, helping you reach distant towers or punch through heavy foliage.
Add Additional Indoor Antennas:
Got dead zones upstairs or on the far side of the house? Many repeater kits support add-on indoor panel or dome antennas (with appropriate splitters). Distributing the boosted signal with multiple antennas means more even coverage and eliminates frustrating signal gaps.
Use Better Cables and Accessories:
Long cable runs or lots of sharp bends can sap signal strength fast. Upgrade to low-loss coaxial cable, keep runs as short and straight as possible, and use high-quality connectors. Accessories like lightning arrestors (especially in storm-prone areas) and weatherproofing boots are smart custom additions too.
Get Creative with Mounting Locations:
If your home’s structure is relentless, don’t be afraid to get creative—mount indoor antennas in the attic, place panel antennas in hallways, or use window-mount pass-throughs if drilling is not an option.
By thoughtfully selecting antennas, optimizing cable runs, and even adding extra indoor coverage, you can turn a good repeater kit into a custom powerhouse—no matter how challenging your signal environment.
The Final, Crucial Steps: Grounding and Connecting
You’re in the home stretch! But don’t cut corners on these last two critical steps.
Grounding Your System: The Unsung Hero
I mentioned it before, but it’s so important it deserves its own section. Any antenna or electronic device mounted outdoors “cURL Too many subrequests by single Worker invocation. To configure this limit, refer to https://developers.cloudflare.com/workers/wrangler/configuration/#limits” be grounded properly. A lightning strike can follow your coax cable into your home and destroy your expensive booster, router, and anything else connected to it, or even cause a fire.
Connect a 10-gauge copper wire from the antenna mount or mast to a dedicated grounding rod driven into the earth. You should also install a lightning surge protector on the coax cable line just before it enters your house, and ground that as well. This provides a safe path for electrical charges to go to the earth instead of into your home.

Connect and Test
Once everything is securely mounted, aimed, and grounded, run the final cable connections to your booster, modem, or router. Power it on, and run some final speed tests. Compare them to the baseline you took at the very beginning. The difference should be night and day!
Conclusion
Whew, that was a deep dive! But honestly, understanding these principles is the key to unlocking the connectivity you’re paying for. By taking a thoughtful, methodical approach to antenna placement, you can overcome frustrating issues like dropped calls, buffering video, and infuriating WiFi dead zones.
It all boils down to getting your antenna in the best possible position to have a clear conversation with the signal source. So go ahead, become a signal detective in your own home. What are some of your biggest signal frustrations? Have you tried an external antenna before? Share your stories and questions in the comments below
