 Skip to content

When optimizing a mobile network, the decision between electrical and mechanical tilt in antenna configurations is extremely important. However, what are these choices and why should you care? Let’s take a closer look at the details.
Electrical down tilt and mechanical tilt are two techniques used to modify the angle of an antenna in order to control its radio frequency pattern. Electrical down tilt employs electronic controls to adjust the beam, while mechanical tilt requires physically adjusting the mounting angle of the antenna.
Let’s delve into the details of each technology to understand how they affect network performance in modern telecommunications.
Understanding the Antenna Radiation Diagram
Before diving into the specifics of tilt, it’s helpful to grasp the fundamentals of an antenna radiation diagram. Think of it as the antenna’s “signal footprint”—a visual map that shows how and where the antenna broadcasts radio waves into its surroundings.
This diagram provides a graphical representation of the antenna’s coverage pattern, illustrating how much signal strength is emitted in various directions. Typically, you’ll encounter two key views:
- Horizontal plane (from above): Reveals how the signal spreads out sideways around the antenna, often marked by compass directions (0°, 90°, 180°, 270°).
- Vertical plane (from the side): Demonstrates the signal’s reach upward and downward, crucial for understanding how adjustments like tilt will change coverage.
Instead of complex 3D models, engineers usually use simplified 2D diagrams for practical analysis. These diagrams combine straight lines—indicating direction or azimuth—with curves or circles that correspond to signal strength in decibels (dB). For instance, a larger curve might show where the antenna achieves peak gain, such as 15 dB.
When a tilt—whether electrical or mechanical—is applied, the shape of this radiation diagram shifts, altering the antenna’s coverage zone. By interpreting these diagrams, network engineers can predict, optimize, and troubleshoot how an antenna will perform in the real world.
Now that we’ve covered the basics of how antennas “draw” their signal landscape, let’s explore how mechanical tilt specifically reshapes this coverage.
Antenna Downtilt vs. Uptilt: What’s the Difference?
Before we move forward, let’s clarify how antennas can be angled and what effect that has on your network.
- Downtilt refers to adjusting the antenna so it points slightly downward. This is by far the most frequent adjustment you’ll encounter. By tilting the antenna down, we focus the signal closer to the ground and towards desired areas—helping reduce interference with distant cells and limiting signal overshoot. Downtilt is a critical tool in urban environments where controlling coverage footprints is essential for performance and minimizing dropped calls.
- Uptilt, on the other hand, is the rare sibling where the antenna is angled upward. This scenario is typically reserved for very specific, often extreme, situations—like filling in coverage gaps on hilly terrain or unique structural environments. Uptilt is seldom used because it can increase unwanted interference with more distant sites and isn’t generally needed in everyday deployments.
In this article, whenever we mention “tilt,” we’re usually talking about downtilt unless specifically stated otherwise. Uptilt will always be explicitly called out since its use is so uncommon in real-world network tuning.
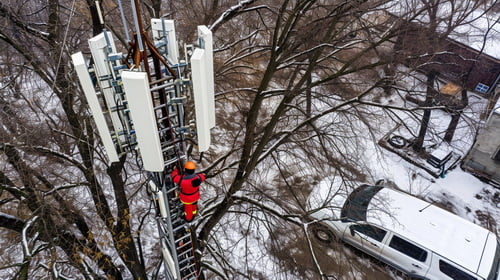
What is Mechanical Tilt?
Mechanical tilt is commonly used in wireless communication systems to optimize the coverage and performance of the antenna. By adjusting the tilt angle, the antenna can be pointed towards a specific area or tilted downward to reduce interference or signal leakage in certain directions. This adjustment is usually done manually by a technician or engineer who physically changes the mounting position or angle of the antenna.
Calculating the Appropriate Tilt Angle
To estimate the optimal tilt angle for targeting a specific coverage area, a straightforward geometric approach is often used. Essentially, the goal is to direct the main lobe of the antenna’s radiation pattern toward the desired region while avoiding any potential signal nulls falling on critical zones.
The basic formula for calculating the tilt angle is as follows:
Tilt Angle = arctangent (Antenna Height / Horizontal Distance to Target Area)
- Antenna Height: The vertical height of the antenna from ground level
- Horizontal Distance: The ground distance from the base of the antenna to the center of the coverage area
Both measurements must use the same unit (meters, feet, etc.) to ensure accuracy. It’s also important to visualize the antenna’s vertical radiation pattern and verify that key null points do not align with important service areas. This hands-on calculation helps engineers quickly adjust antennas for optimal signal coverage and minimal interference.
Understanding Horizontal and Vertical Radiation Diagrams
To truly appreciate how antenna tilt works, it helps to first grasp the concept of the antenna’s radiation pattern. This pattern is typically depicted through two primary diagrams: the horizontal radiation diagram (also known as the azimuth pattern) and the vertical radiation diagram (or elevation pattern).
Horizontal Radiation Diagram:
Imagine you’re looking straight down at the antenna from above. The horizontal diagram shows how the antenna distributes its signal across different compass directions—north, south, east, and west. This “birds-eye view” reveals the coverage footprint on the ground, highlighting which directions receive the strongest signal. For example, a directional antenna might focus energy narrowly in one direction, while an omnidirectional antenna forms a more uniform ring around itself.
Vertical Radiation Diagram:
Now, picture standing to the side of the antenna. The vertical diagram illustrates how the antenna directs energy above, directly ahead, and below its mounting height. This pattern is especially important for understanding how far the signal reaches and at which angles the energy is distributed—think of it like a side profile showing whether the antenna throws its signal far out to the horizon or aims more steeply toward the ground.
Both diagrams are typically plotted with reference lines for orientation. Straight lines indicate the primary directions (often labeled with angles like 0, 90, 180, and 270 degrees), while curves or circles represent signal strength—often measured in decibels (dB)—at various angles. Larger loops in the pattern correspond to areas where the antenna achieves higher gain, showing where users can expect the strongest coverage.
cURL Too many subrequests.
cURL Too many subrequests.
cURL Too many subrequests.
cURL Too many subrequests.
cURL Too many subrequests.
cURL Too many subrequests.
cURL Too many subrequests.
cURL Too many subrequests.
cURL Too many subrequests.
cURL Too many subrequests.
cURL Too many subrequests.
cURL Too many subrequests.
cURL Too many subrequests.
cURL Too many subrequests.
cURL Too many subrequests.

cURL Too many subrequests.
cURL Too many subrequests.
cURL Too many subrequests.

cURL Too many subrequests.
In multi-band antennas, the electrical tilt range and gain can differ notably between frequency bands, owing to the unique propagation characteristics of each band. For instance, lower frequency bands (such as an 800 MHz band) generally experience less propagation loss than higher frequency bands (like 1800 MHz or 2100 MHz). As a result, the antenna’s design accommodates these differences to maintain balanced coverage.
- Electrical Tilt Range: Manufacturers often set distinct tilt adjustment limits for each band. For example, the lower band might allow for electrical tilt between 0° and 10°, while the higher band is adjustable from 0° to 6°. This distinction helps tailor the radiation pattern in accordance with the differing coverage and interference considerations of each band.
- Antenna Gain: Lower frequency bands typically have lower antenna gain compared to higher bands. This is intentional—by reducing gain in the lower band, the antenna compensates for its reduced path loss, helping to equalize the coverage footprint across both frequency bands. This design approach ensures that users experience consistent service whether their device is operating on the lower or higher band.
Understanding these differences is crucial when configuring multi-band antennas in the field. Adjusting the electrical downtilt for each band independently allows network planners to optimize both coverage and quality, ensuring a more uniform user experience throughout the service area.
Advantages of Electrical Down Tilt
1. Improved coverage: Electrical down tilt allows for the adjustment of the antenna beam angle, which can help improve coverage in specific areas. By tilting the antenna downwards, the signal is focused towards the ground, increasing the signal strength in the desired coverage area.
2. Reduced interference: Electrical down tilt can also help reduce interference from other nearby cell sites. By tilting the antenna downwards, the signal is directed towards the ground, reducing the likelihood of interference from other cell sites operating on the same frequency.
3. Increased capacity: Electrical down tilt can help increase the capacity of a cell site by reducing the interference between different sectors. By tilting the antenna downwards, the signal is more focused towards the desired coverage area, reducing the signal spillage into neighboring sectors and improving the overall capacity of the cell site.
4. Better signal quality: Electrical down tilt can improve the signal quality for users located at the cell edge or in areas with poor coverage. By tilting the antenna downwards, the signal is directed towards the ground, reducing the distance the signal has to travel and improving the signal quality for users in those areas.
5. Cost-effective solution: Electrical down tilt is a cost-effective solution for improving coverage and capacity in specific areas. It allows network operators to optimize the performance of their existing cell sites without the need for significant infrastructure upgrades or the installation of additional cell sites.
Challenges with Electrical Down Tilt
1. Power distribution: One of the main challenges with electrical down tilt is ensuring proper power distribution to the antenna. As the antenna is tilted downwards, the power needs to be adjusted accordingly to maintain optimal performance. This requires a complex power distribution system that can adjust the power levels based on the tilt angle.
2. Signal degradation: When the antenna is tilted downwards, the signal quality can degrade due to various factors such as interference from nearby structures, ground reflection, and diffraction. These factors can cause signal loss, multipath propagation, and reduced coverage area. Overcoming these challenges requires careful planning and optimization of the antenna system.
3. Mechanical stability: Electrical down tilt requires physically moving the antenna to the desired angle. This movement can introduce mechanical instability, especially in high wind or extreme weather conditions. Ensuring the antenna remains stable and pointing in the desired direction is crucial for maintaining reliable communication.
4. Interference: When the antenna is tilted downwards, it may be more susceptible to interference from nearby antennas or other electronic devices. This can result in signal degradation and reduced performance. Mitigating interference requires careful frequency planning, shielding, and isolation techniques.
5. Cost: Implementing electrical down tilt can be costly, especially for large-scale deployments. It requires specialized antennas, power distribution systems, and often additional equipment such as remote electrical tilt (RET) controllers. The cost factor needs to be carefully considered when deciding to implement electrical down tilt.
Verifying Antenna Tilt Adjustments in the Field
After making adjustments to antenna tilt—whether electrical or mechanical—it’s essential to confirm that the desired changes in coverage and signal quality have actually been achieved. The most practical way to do this is through on-site measurement and analysis.
Field Verification Methods:
- Drive Testing: Teams use specialized equipment, often installed in vehicles, to collect signal strength and quality data while traversing the area around the antenna site. This paints a real-world picture of coverage before and after the tilt adjustment.
- Coverage Predictions: Simulation tools, like those from Atoll, Infovista, or Forsk, can model expected coverage patterns based on tilt angle, antenna height, and surrounding geography. Predictive modeling helps set expectations and guide which areas to inspect more closely in the field.
- Post-Adjustment Comparison: After implementing a tilt change (for example, setting electrical tilt to 8 degrees versus applying an 8-degree mechanical tilt), you can compare:
The actual coverage footprint as seen in drive test results and user devices.
Signal quality at cell edges and in areas previously flagged for weak reception.
Consistency of service across the intended coverage area.
- Analyzing Patterns: Typically, mechanical tilt might reduce central coverage while stretching signals out sideways, which could be useful for certain site layouts. Electrical tilt, on the other hand, tends to uniformly contract or expand coverage in line with the antenna’s main direction.
Key Considerations When Verifying Tilt:
- Always compare the antenna’s physical orientation to the intended area of coverage.
- Reference the antenna’s vertical radiation pattern to ensure you aren’t inadvertently aiming coverage gaps, or “nulls,” at high-priority areas.
- Use a basic geometric approach—often an arctangent calculation between antenna height and target distance—to estimate the ideal tilt angle for your specific needs.
Verifying antenna tilt in practice means blending simulation with field measurements to align network performance with real-world demands—applying adjustments, checking results, and refining as needed for optimal coverage and capacity.
Typical Antenna Tilt Values for Different Scenarios
Selecting the right tilt angle often depends on both the antenna gain and the size of the cell being served. While there isn’t a strict universal standard, field experience suggests some common starting points that network engineers frequently use:
- For antennas with 15 dBi gain: It’s typical to begin with an electrical tilt in the range of 7 to 8 degrees. The higher end of this range is generally reserved for smaller, denser cells—think of city centers teeming with users. With these values, you can expect a moderate reduction in signal strength at the cell’s horizon, usually around 3 to 5 dB.
- For antennas with 18 dBi gain: cURL Too many subrequests.
- cURL Too many subrequests. cURL Too many subrequests.
- cURL Too many subrequests. cURL Too many subrequests.
- cURL Too many subrequests. cURL Too many subrequests.
cURL Too many subrequests.
cURL Too many subrequests.
cURL Too many subrequests.
cURL Too many subrequests.
cURL Too many subrequests.
cURL Too many subrequests.
cURL Too many subrequests.
- cURL Too many subrequests. cURL Too many subrequests.
- cURL Too many subrequests. cURL Too many subrequests.
- Antenna Gain: cURL Too many subrequests.
Determining Equivalent Tilt
Because the tilt ranges and propagation characteristics aren’t the same for every band, using the same tilt angle (e.g., 6° on both bands) doesn’t guarantee the same coverage area. Instead, you should:
- Consult Antenna Diagrams: Review the radiation patterns and performance charts provided by manufacturers like CommScope, Kathrein, or Huawei for each frequency band.
- Develop a Correlation Table: Create a reference table matching various tilt values on the lower band (X) to their “equivalent” tilt values on the higher band (Y) that result in similar coverage zones. For instance:
- X Band 0° = Y Band 0°
- X Band 5° ≈ Y Band 3°
- X Band 10° = Y Band 6°
- Field Verification: Test these equivalent settings in real network conditions to fine-tune the correlation. Be mindful that the relationship is not always a strict one-to-one ratio; it depends on actual site conditions and each band’s behavior.
By maintaining and distributing such a reference table, your field teams can make quick, informed decisions, ensuring that tilting adjustments on one band are properly mirrored by equivalent adjustments on the other bands. This practice minimizes coverage gaps and avoids mismatched network performance when managing multiband antenna systems.
Complexity of Applying Tilt in Multi-Band Antennas
Adjusting tilt on antennas that operate across multiple frequency bands introduces a few extra layers of complexity, primarily because each frequency behaves a little differently. As you’ve likely seen, antennas designed for more than one band—say, a dual-band model covering both low and high frequencies—don’t have identical tilt characteristics for each band.
cURL Too many subrequests.
- Different propagation losses: Lower frequencies (like the 700 MHz band) typically travel farther and experience lower path loss, while higher frequencies (like 1800 MHz or 2600 MHz) have higher losses and shorter range. To compensate, antennas offer different gain values and tilt adjustment ranges for each band.
- Varying tilt ranges: What counts as “maximum tilt” for one band may be less than “maximum” for another. For example, Band X might support a tilt from 0° to 10°, while Band Y may only allow tilts between 0° and 6°. Simply matching tilt values between the two doesn’t guarantee that both frequencies will provide similar coverage patterns.
- Coverage correlation isn’t one-to-one: You might assume that a 5° tilt on Band X and a 5° tilt on Band Y would have the same effect. Unfortunately, because each band’s radiation pattern and propagation loss are unique, equivalent tilts often differ. Achieving balanced coverage requires careful calibration.
Practical Solution:
To avoid mismatches, network engineers often create correlation tables. These tables break down the optimal tilt settings for each supported band so that, whenever you adjust tilt for one frequency, you can make a corresponding, proportional change on the other. This simple reference reduces guesswork and ensures the antenna delivers uniform coverage across all its bands.
By maintaining this kind of systematic approach, teams in the field can reliably set equivalent tilts, minimizing coverage gaps or overlaps that might otherwise frustrate users—while keeping network performance steady and predictable.
Implementing Tilt Adjustments: Best Practices for Structure and Organization
When it comes to making antenna tilt adjustments—whether mechanical or electrical—a systematic approach is key to ensuring network consistency and performance.
Follow a Stepwise Adjustment Process
- Adjust antennas in small, controlled increments—typically 2 or 3 degrees per step. This methodical approach minimizes unexpected impacts on coverage and interference.
- Make only one change at a time. After each adjustment, monitor performance metrics to assess the effect before proceeding further.
Document Each Adjustment Thoroughly
- Keep a detailed log of each tilt modification, including the angle, frequency band (if applicable), date, and reason for the change.
- Use clear labels or digital records so any member of the team can quickly understand the antenna’s current configuration.
Promote Team Communication and Awareness
- Share all changes with the team, ideally through a centralized documentation platform or regular update meetings.
- Consistent communication ensures that everyone is aware of the current network configuration and avoids unintentional overlapping efforts.
By maintaining a structured and collaborative approach, network operators can optimize coverage and reduce operational errors, laying a solid foundation for efficient network management.
Managing Tilt Correlations Across Multiple Frequency Bands
When working with antennas that support multiple frequency bands, it’s important to note that each band behaves a bit differently due to varying propagation losses and gain characteristics. This means that the same tilt angle won’t necessarily deliver equivalent coverage across all bands.
For example, a dual-band antenna might allow for up to 10° of electrical tilt on a lower-frequency band (let’s call it Band X), but only up to 6° on a higher-frequency band (Band Y). Simply setting both bands to the same degree of tilt won’t guarantee balanced coverage, since their effective footprints differ.
Best Practice: Use a Correlation Table
To address this, create an auxiliary table that maps “equivalent” tilt angles between each band. For instance:
- If Band X is set at 0°, then Band Y should also be at 0°.
- cURL Too many subrequests.
- cURL Too many subrequests.
cURL Too many subrequests.
cURL Too many subrequests.
cURL Too many subrequests.
cURL Too many subrequests.
cURL Too many subrequests.
cURL Too many subrequests.
cURL Too many subrequests.
cURL Too many subrequests.
- cURL Too many subrequests.
- cURL Too many subrequests.
- cURL Too many subrequests.
cURL Too many subrequests.
cURL Too many subrequests.
cURL Too many subrequests.
- cURL Too many subrequests.
- cURL Too many subrequests.
- cURL Too many subrequests.
By maintaining thorough and up-to-date documentation, network operators preserve operational continuity, streamline maintenance, and enable faster, data-driven optimization, all while minimizing the risk of errors or confusion.
Impact on Network Coverage
Both mechanical tilt and electrical tilt are methods used to adjust the coverage of a network, but they are effective in different situations. Mechanical tilt is better for providing coverage over a large, consistent area, which makes it useful in rural or suburban areas. Electrical tilt is better for situations where the demand for coverage changes frequently and adjustments need to be made accordingly, like in urban areas or at events.
Why Tilt Adjustment Reduces Coverage—and Why That’s Not Always a Bad Thing
Whenever you adjust the tilt—whether electrical or mechanical—some reduction in overall coverage is inevitable. Tilting an antenna down narrows the area that receives a strong signal, concentrating radio waves more tightly in the desired coverage zone. As a result, far-flung areas at the edge of the previous signal footprint may experience weaker reception, or even lose coverage entirely.
But here’s the key point for network planning: this reduction isn’t necessarily a drawback. In fact, intentionally limiting coverage can be a strategic move. By shrinking the footprint, you minimize unwanted overlap between adjacent cells, which helps control interference and keeps each sector focused on its intended users. This is especially crucial in busy city centers, stadiums, or concert venues, where precision and capacity matter more than simply covering a broad area.
So, while coverage loss is an unavoidable part of adjusting tilt, the important question is whether the new, more focused coverage better matches network needs. In scenarios where reducing spillover prevents interference with neighboring cells, the “loss” of coverage is really a gain in efficiency and overall network quality.
Evaluating Distant Coverage: When to Adjust with Tilt
When assessing coverage that extends far beyond a site, it’s crucial to consider both the network’s design objectives and the location’s unique context. For example, in rural environments, having some level of distant coverage can be desirable—especially if it supports users in less populated or remote areas. Here, maintaining the reach may align with the operator’s goals for broad area service, such as along highways or in agricultural zones.
In contrast, if the site is located within a city, unintentional long-range coverage is more likely to generate what we often call ‘spurious’ or stray signals. These stray signals don’t just waste resources—they can lead to unnecessary interference for other urban cell sites operating on the same frequency, complicating frequency planning and potentially degrading overall network quality.
To decide whether to allow or restrict such coverage:
- Keep distant coverage in rural regions if it contributes to seamless service for outlying users, provided this aligns with company strategy.
- Reduce excessive coverage in dense urban settings, where unwanted signal extension can create more problems than benefits. Here, making targeted adjustments—such as increasing antenna tilt—can help sharpen sector boundaries and ensure energy is directed where it’s needed.
By tailoring your approach to the area’s characteristics, you ensure each cell site supports the network’s broader capacity and coverage goals without contributing to avoidable interference.
Insights from Traffic Distribution and Coverage Analysis After Antenna Tilt
Evaluating how traffic is distributed across a network and how the coverage area changes following an antenna tilt provides valuable insights for network operators. This process typically involves using performance counters, such as Timing Advance (TA) values in GSM networks, which can indicate how far users are from the cell site. By exporting and comparing this data—before and after a tilt adjustment—network teams can easily measure shifts in coverage reach and traffic concentration.
Mapping these data points in a geographic information system (GIS), like Google Earth, adds another layer of clarity. Visualizing coverage helps pinpoint high-traffic zones or areas at the coverage edge. For example, one might notice clusters of usage (e.g., locations generating between 10 and 45 Erlangs of traffic), and observe how those clusters migrate when the tilt is altered.
This kind of analysis also reveals:
- The proportion of total traffic handled by specific areas within a cell, allowing operators to see which locations contribute most to network load.
- Whether distant or fringe regions are still served post-adjustment, which may be acceptable in rural contexts but could indicate unwanted signal overspill in urban deployments.
- If anomalies or “spurious” signals persist in locations far from the site, helping to guide decisions on whether to further refine antenna tilt for optimal performance.
By systematically reviewing these metrics, operators can fine-tune coverage and capacity, ensuring the cell best serves its intended area while minimizing unnecessary overlap and interference.
Interpreting Traffic and Coverage Maps After Tilt Adjustments
When it comes to understanding the effects of antenna tilt changes, traffic and coverage maps offer valuable, real-world insights that go beyond the theoretical. Once a tilt adjustment is made—whether mechanical or electrical—it’s important to verify the results to ensure that the desired network improvements have actually been achieved.
One practical method involves analyzing network performance counters, particularly those related to timing advance (TA) in GSM networks. TA data can show how far users are from the cell site, helping you gauge changes in coverage area before and after a tilt adjustment. By exporting these counters and mapping them, say, in Excel or a geographic information system like Google Earth, you can visualize how the distribution of users and traffic shifts in response to the tilt change.
Consider plotting traffic intensity (measured in Erlangs) for each cell location. By color-coding these points on a map, you immediately spot where high or low concentrations of traffic exist. For example, red zones might indicate heavy usage (e.g., 40-45 Erlangs), while lighter colors represent areas with less activity. Clicking on any point can reveal not just traffic volumes, but also what percentage of the cell’s total traffic is served at that spot—a critical metric for evaluating coverage efficiency.
These maps can reveal if the tilt change has centered traffic within the intended sector, reduced unwanted signal spillage, or inadvertently created areas with excessive overlap or coverage gaps. For clusters of traffic far from the site—especially beyond the intended service area—you need to consider context: traffic in rural fringe zones may be expected, while stray signals in urban environments may suggest a need for further tilt optimization.
By regularly comparing these visualizations before and after each adjustment, network designers can quickly pinpoint whether a tilt change is enhancing coverage and capacity or if further tuning is required. This approach not only ensures efficient use of network resources but also helps maintain a high quality of experience for end users.
Correlating Tilt Values Across Multiple Frequency Bands
When working with antennas that support multiple frequency bands, it’s crucial to align the tilt values for each band. This is because different frequency bands behave differently as they travel through the environment—lower frequencies typically cover larger areas with less loss, while higher frequencies have a shorter range and are more susceptible to obstacles and interference.
Each band on a multi-band antenna often has its own range of allowed electrical tilt. For instance, you might find the low band allows tilt adjustments from 0 to 10 degrees, while the higher band is limited to 0 to 6 degrees. If you apply the same numerical tilt value to both bands, the resulting coverage areas may not match up as you’d expect. For example, a 6-degree tilt on the low band won’t produce the same coverage footprint as a 6-degree tilt on the high band.
This mismatch can create gaps or overlaps in coverage, leading to uneven user experience and possible interference issues. To avoid this, it’s helpful to create a correlation chart that matches equivalent tilt settings across your bands—ensuring, for example, that a mid-range tilt on the low band aligns with the correct proportionate tilt on the high band.
By maintaining and sharing this mapping with your field teams, you can streamline site adjustments. That way, whenever one band’s tilt changes, the corresponding tilt for the other bands can be set efficiently and accurately, preserving balanced coverage and optimal network performance.
Frequency Bands, Propagation Loss, and Tilt Settings
Not all frequency bands behave the same way when it comes to signal propagation. Lower frequency bands tend to experience less propagation loss, allowing signals to travel farther and penetrate obstacles more effectively. On the other hand, higher frequency bands generally have higher propagation losses, reducing their effective coverage area.
This difference means that a single antenna supporting multiple frequency bands—say, one operating on both 700 MHz (low) and 2100 MHz (high)—won’t perform identically across those frequencies. To compensate, antennas are engineered with separate tilt ranges and gain values for each band. For instance, you might find:
- The low-frequency setting (e.g., 700 MHz) has an electrical tilt adjustment range up to 10 degrees.
- The high-frequency setting (e.g., 2100 MHz) might only adjust up to 6 degrees.
Because the lower band propagates more easily, it doesn’t need as much gain to cover the same area as the higher band, which loses energy more rapidly. Tilt settings are carefully selected for each band so their coverage footprints line up as closely as possible. This ensures consistent user experience regardless of which frequency their device is using.
cURL Too many subrequests.
cURL Too many subrequests.
cURL Too many subrequests.
- cURL Too many subrequests. cURL Too many subrequests.
- cURL Too many subrequests. cURL Too many subrequests.
- cURL Too many subrequests. cURL Too many subrequests.
cURL Too many subrequests.
cURL Too many subrequests.
cURL Too many subrequests.
cURL Too many subrequests.
cURL Too many subrequests.
- cURL Too many subrequests.
- cURL Too many subrequests.
cURL Too many subrequests.
cURL Too many subrequests.
cURL Too many subrequests.
By adjusting the electrical tilt, the network can optimize the coverage and capacity of each cell, ensuring that each cell serves its intended area without causing interference to neighboring cells. This can be particularly important in urban areas where multiple cells are in close proximity to each other.

When cells have a fixed mechanical tilt, it may not be possible to adjust the coverage area or capacity of a cell in response to changes in network load. This can lead to inefficient use of network resources and potentially decreased network capacity.
Overall, electrical tilt provides more flexibility and control over network capacity by allowing operators to adjust the coverage and capacity of cells in real-time based on network load and demand.
Verifying the Effects of Tilt Adjustments
Once a tilt adjustment is made—whether mechanical or electrical—it’s important to confirm how these changes impact actual network performance and coverage. There are several practical methods operators can use to assess the effects:
1. Field Measurements and Drive Testing
One of the most direct verification methods involves field measurements, such as drive tests. By moving through the coverage area with specialized test equipment, engineers can collect real-world data on signal strength, quality, and coverage boundaries before and after tilt adjustments.
2. Analysis of Coverage Predictions
Before implementing any changes, engineers typically use coverage prediction tools and software simulations, like those offered by Atoll or Mentum Planet. By comparing pre- and post-tilt prediction models, they can visualize how the coverage footprint shifts and identify potential gaps or overlaps in service.
3. Reviewing Performance Counters and KPIs
Operators can also monitor network Key Performance Indicators (KPIs) and specific performance counters—such as Timing Advance (TA) distributions in GSM networks. By exporting these metrics into spreadsheets like Excel, it’s possible to see changes in coverage area, traffic concentrations, or signal quality after a tilt change. For instance, shifts in the distribution of TA values can reveal if the coverage edge moved closer or farther from the antenna.
4. Geographic Visualization Using Mapping Software
For a more visual approach, KPI data and cell site information (such as coordinates and azimuth) can be imported into Geographic Information System (GIS) programs like Google Earth or QGIS. Mapping traffic or signal metrics by location helps engineers pinpoint areas with high or low usage, visualize the impact of coverage changes, and quickly identify outlier regions with unexpected signal reach.
5. On-Site Spot Checks
Targeted measurements in specific areas of interest—such as high-traffic locations or known dead zones—allow for detailed, location-specific verification. This can confirm whether the tilt adjustment improved performance where it was most needed.
6. Comparing Historical Trends
By reviewing historical KPI data and traffic heatmaps, operators can identify trends or anomalies following a tilt change. This helps validate whether coverage improvements are sustained over time and whether any unintended side effects, like increased interference, have arisen.
Using this combination of quantitative data, visualization tools, and on-the-ground measurements ensures that tilt adjustments truly deliver their intended network improvements.
Methods for Assessing Tilt Adjustments
When it comes to evaluating the effects of tilt adjustments, operators rely on a suite of tools and measurements—each with its own advantages and level of detail.
- Drive Tests: These involve collecting real-world signal data by physically driving (or walking) through the coverage area with specialized equipment. Drive tests help identify how tilt changes impact signal strength, coverage boundaries, and areas of potential signal degradation. The results give a ground-level perspective of user experience before and after tilt modifications.
- Coverage Predictions: Using radio planning software, network engineers can model coverage areas and simulate the effects of different tilt angles. This predictive insight is especially useful for pre-implementation planning or for adjustments in hard-to-access areas. Such simulations enable operators to estimate changes in signal reach and potential coverage gaps caused by tilt changes.
- On-Site Measurements: Sometimes called spot checks or field measurements, these are targeted signal quality assessments carried out at specific locations, such as at high-traffic venues or customer complaint hotspots. By measuring signal metrics directly at these sites, operators can validate whether the tilt adjustment delivers the expected improvement (or mitigation of interference).
- Performance Counters and KPIs: Modern networks collect detailed statistics at the cell level. Key Performance Indicators (KPIs), such as signal quality, dropped calls, and handover success rates, can reveal the impact of tilt adjustments over time. More granular counters, like Timing Advance (TA) distributions in GSM networks or Reference Signal Received Power (RSRP) ranges in LTE, help pinpoint shifts in coverage footprint and traffic concentration after each tilt change.
- Data Visualization: For a deeper analysis, engineers often export KPI and counter data (for example, TA statistics) to spreadsheet tools or Geographic Information Systems (GIS)—think ArcGIS or even Google Earth. By plotting the spatial distribution of users or signal reach before and after a tilt update, operators can clearly visualize how the coverage area has shifted, identify newly underserved zones, and track changes in where users are connecting from.
Taken together, this toolbox lets network teams systematically assess and refine antenna tilt, ensuring that coverage and capacity are always aligned with real-world demand.
Suitability for Different Environments
Static Environments: Mechanical tilt is suitable for areas where the network traffic remains constant and predictable. In such environments, the tilt angle can be set once and left unchanged as there are no significant changes in the network demand or traffic patterns.
Dynamic Environments: Electrical tilt is more suitable for areas where the network traffic patterns change frequently and rapidly. In these environments, the electrical tilt can be adjusted remotely and dynamically to optimize the coverage and capacity of the network. This allows the network to adapt to the changing demands and traffic patterns in real-time, providing better service quality and performance.
Case Studies
For instance, during a major sports event in a city, operators could use electrical tilt to dynamically adjust coverage and capacity to match the high, fluctuating demand. Conversely, a scenic rural area with consistent tourist traffic might only require a fixed mechanical tilt setup to ensure satisfactory coverage.
Another example could be a shopping mall that experiences high foot traffic during weekends and holidays, but lower foot traffic during weekdays. In this case, operators could use electrical tilt to adjust coverage and capacity during peak times, and switch to a fixed mechanical tilt setup during off-peak times.
In a dense urban area with tall buildings, operators could use electrical tilt to adjust coverage and capacity based on the location of the buildings and the movement of people. This would ensure that users in different areas of the city receive a strong signal, even when surrounded by tall buildings that could potentially block the signal.
In a remote, mountainous region with limited population, operators might only need a fixed mechanical tilt setup to provide coverage to a small number of users. The lack of high demand and the limited number of users would not require the use of electrical tilt to dynamically adjust coverage and capacity.

Overall, the choice between electrical tilt and fixed mechanical tilt depends on the specific needs and demands of the location. Electrical tilt provides more flexibility and adaptability, while fixed mechanical tilt is simpler and more cost-effective for areas with consistent demand.
Exporting and Analyzing KPIs and Distance Counters After Tilt Adjustments
Network operators can verify the impact of tilt changes by examining a range of Key Performance Indicators (KPIs) and distance-based counters, offering both high-level and granular insights into network performance. After making a tilt adjustment—mechanical or electrical—there are a few reliable workflows to track and analyze results.
cURL Too many subrequests.
cURL Too many subrequests.
cURL Too many subrequests.
cURL Too many subrequests.
cURL Too many subrequests.
cURL Too many subrequests.
cURL Too many subrequests.
cURL Too many subrequests.
cURL Too many subrequests.
cURL Too many subrequests.
cURL Too many subrequests.
cURL Too many subrequests.
cURL Too many subrequests.
cURL Too many subrequests.
cURL Too many subrequests.
- cURL Too many subrequests. cURL Too many subrequests.
- cURL Too many subrequests. cURL Too many subrequests.
- Facilitate Training and Onboarding: New technicians can use the correlation table as a practical guide, minimizing guesswork and helping them quickly adapt to field procedures.
For ongoing success, make it a habit to review and update the correlation table regularly, especially as network configurations evolve or new bands are introduced. This proactive approach helps maintain optimal performance across the entire network.
Future Trends
As networks evolve towards 5G and beyond, the demand for highly adaptive network management solutions will increase, likely pushing electrical tilt technologies to the forefront. However, mechanical tilt will still have its place in scenarios where simplicity and reliability are paramount.
Additionally, as more devices become connected to the internet, the demand for network security will continue to grow. Network administrators will need to implement more advanced security measures to protect against cyber threats and ensure the privacy of users.
Another trend is the increasing use of artificial intelligence and machine learning in network management. These technologies can help automate network tasks, optimize performance, and detect and respond to network issues in real-time.
The Internet of Things (IoT) will also have a significant impact on network management. With billions of devices expected to be connected to the internet, network administrators will need to develop strategies to manage and support this massive influx of devices.
Furthermore, as cloud computing continues to grow, network management will need to evolve to support the demands of cloud-based applications and services. This includes ensuring sufficient bandwidth, low latency, and high availability to support cloud-based operations.
Lastly, as more businesses adopt remote work policies and distributed workforces become the norm, network management will need to adapt to support these remote workers. This includes providing secure remote access to company networks and ensuring reliable and fast connections for remote workers.
Conclusion
In summary, the decision to use either an electrical down tilt or mechanical tilt antenna will depend on the specific requirements of the environment and network. Both have their advantages and disadvantages, and the choice should be made after considering the network requirements, cost implications, and expected traffic patterns. Understanding these factors will help you deploy the right technology to ensure the best network performance and user experience.
It’s also important to account for a few key technical details when determining the ideal antenna tilt. The optimal tilt angle is influenced by variables such as the antenna’s height, type, and the surrounding topography—including any buildings, trees, or other obstacles that might impact signal propagation.
A practical approach is to estimate the tilt angle using a simple geometric calculation to ensure the antenna’s vertical beam is directed toward your target coverage area. Specifically, you can use:
Angle = arctan (Height / Distance)
Make sure that both height and distance are measured in the same units. This calculation helps position the main lobe of the antenna pattern where coverage is most needed. Additionally, consider the antenna’s vertical radiation diagram and avoid aiming null points—areas of minimal signal—toward critical coverage zones.
Carefully weighing these factors, alongside operational and business needs, will lead to a more effective and reliable deployment, ensuring your network delivers consistent quality and coverage where it matters most.