 Skip to content
Have you ever wondered how antennas stay securely attached to their positions, whether high up on a building or mounted on a vehicle? The secret lies in a small yet pivotal component: the mounting bracket. Let’s delve into what mounting brackets are and why they’re crucial for antenna setups.
A mounting bracket for an antenna is a crucial component that secures the antenna to a specific location, ensuring it maintains the correct orientation for optimal signal reception. These brackets come in various forms, including wall mounts, mast mounts, and pole clamps, designed to accommodate different installation environments and antenna types.
But why is choosing the right mounting bracket more important than it seems?
What is an Antenna Bracket?
An antenna bracket is a device used to mount an antenna securely in place. It is designed to provide stability and support for the antenna, ensuring it remains in the desired position for optimal signal reception and transmission.
Antenna brackets are typically made of metal, such as steel or aluminum, to provide strength and durability. They are designed to withstand the weight and wind load of the antenna, preventing it from moving or falling.
There are different types of antenna brackets available, depending on the application and the type of antenna being used. Wall brackets are commonly used to mount antennas on the side of buildings or other structures. Pole brackets are used to attach antennas to poles or masts. Roof brackets are designed for mounting antennas on rooftops. Ground brackets are used for freestanding antennas that are placed on the ground.
In addition to these, there are specialized options such as J-arm dish brackets—ideal for satellite dishes—vent mounts, plastic radio mounts, and adjustable eave mounts for unique installation scenarios. Roof/wall mounts for masts offer flexibility for either horizontal or vertical surfaces, while pole mounts can accommodate various diameters and are suitable for both temporary and permanent setups. This wide variety of bracket types ensures that antennas can be securely installed in virtually any location, whether on a commercial building, residential rooftop, or remote outdoor site.
Non-Penetrating Roof Mounts: Features and Benefits
Non-penetrating roof mounts offer a practical solution for mounting antennas and satellite dishes without compromising the integrity of your roof. Unlike traditional mounts that require drilling holes, these mounts rest securely on top of the roof using a weighted base, preserving roofing materials and preventing leaks.
Key features and benefits include:
- Versatility: Designed to accommodate a wide range of antennas, satellite dishes, and foot-plate sizes, making them suitable for various residential and commercial applications.
- Easy Installation: Since no holes or bolts are needed, installation is quicker, and rooftops remain undamaged—perfect for leased properties or historical buildings where structural changes are discouraged.
- Stability: Constructed from robust materials such as galvanized steel, non-penetrating mounts provide strong support and can withstand significant wind and weather exposure when properly ballasted.
- Repositioning Flexibility: These mounts can be moved and relocated as needed without leaving permanent marks behind, offering flexibility if your antenna or dish placement needs to change.
With these benefits, non-penetrating roof mounts are an excellent choice for maintaining both signal performance and the health of your roofing structure.
Mounting Solutions for Dish Antennas
When it comes to mounting dish antennas, there’s a range of specialized solutions to suit different installation scenarios. For example, J-arm brackets are commonly used to securely fix satellite dishes or small directional antennas, providing both stability and versatility in positioning. Vent mounts allow for installation without drilling into your roof, using existing roof vents as anchor points.
Other options include wall or roof mounts for masts—ideal for elevating larger antennas above obstacles—and adjustable eave mounts, which attach to the overhanging edges of roofs. Pole mounts and plastic radio mounts are also available, offering further flexibility for unique setups or temporary installations. Each of these mounting solutions is designed to ensure the dish operates reliably, no matter where it’s installed.
The Purpose and Benefits of ‘Y’ Style Boxed Pole/Wall Mounts
When it comes to mounting antennas or satellite dishes, stability is everything—especially in challenging environments like rooftops or high-wind locations. This is where ‘Y’ style boxed pole/wall mounts shine.
Unlike standard mounts, the ‘Y’ configuration features an additional third leg for extra reinforcement. This added support helps to evenly distribute the antenna’s weight and enhances stability on both vertical and horizontal surfaces. Whether you’re dealing with heavy antennas or larger satellite dishes, this design minimizes wobble and significantly reduces the risk of movement or tipping over time.
‘Y’ style mounts are particularly useful for installations that demand greater durability, offering peace of mind when wind, vibration, or uneven surfaces might otherwise compromise your setup. They’re an excellent choice for ensuring your antenna remains firmly fixed, maintaining optimal signal quality through every season.
What Are ‘Y’ and ‘Z’ Type Side Chimney Mounts?
‘Y’ and ‘Z’ type side chimney mounts are specialized antenna brackets designed for securely attaching antennas to the side of a chimney. These mounts offer robust support by distributing weight across multiple points. The ‘Y’ style mount features a third leg for additional stability, making it ideal for larger or heavier antennas. Both ‘Y’ and ‘Z’ side chimney mounts typically include a set of long, galvanized steel straps—often up to 18 feet in length—which wrap around the chimney to firmly anchor the bracket in place. This setup ensures the antenna remains stable and secure, even in challenging weather conditions.
Types of Mounts for Panel Antennas (3GPP Bands)
When it comes to mounting panel antennas designed for 3GPP bands, there are several specialized options to consider. Each type is engineered to address particular installation requirements and provide enhanced stability:
- Non-penetrating roof mounts: Ideal for situations where you want to avoid drilling into the roof structure. These mounts use weighted foot-plates and can accommodate a range of panel antennas and satellite dishes, making them suitable for temporary or less invasive installations.
- ‘Y’ style pole and wall mounts: These mounts come equipped with a third leg for additional support, increasing stability, especially in high-wind environments or for heavier antennas.
- Chimney mounts (‘Y’ and ‘Z’ type): Designed specifically for mounting antennas to chimneys, these brackets utilize long, galvanized straps—often up to 18 feet—to securely anchor the antenna without damaging masonry.
Additionally, panel antennas intended for 3GPP bands frequently feature dual cross-polarization, which enhances signal performance and requires mounting solutions that accommodate this specialized configuration.
Selecting the appropriate mount ensures your panel antenna remains securely in place and performs optimally across demanding conditions.
Antenna brackets are essential for ensuring the proper installation and performance of antennas. They help to position the antenna at the correct height and angle to avoid signal obstructions and interference. They also provide a stable base for the antenna, preventing it from being affected by strong winds or other environmental factors.
In summary, an antenna bracket is a device used to mount and support antennas. It provides stability, positioning, and protection for the antenna, ensuring optimal signal reception and transmission.
What Does a Mounting Bracket Do?
Mounting brackets are used to attach and secure an antenna to a structure such as a roof, wall, or pole. They are typically made of metal and are designed to be strong and durable.
The primary function of a mounting bracket is to provide stability for the antenna. It holds the antenna in place and prevents it from moving or shifting. This is particularly important in areas with high winds or other extreme weather conditions that could cause the antenna to be knocked out of alignment.
Mounting brackets also allow for optimal positioning of the antenna. They can be adjusted and angled to ensure that the antenna is facing in the correct direction for the best signal reception. This is especially important for antennas that need to be pointed towards a specific transmitter or satellite.
In addition, mounting brackets provide protection for the antenna against environmental challenges. They help to keep the antenna elevated off the ground, which can prevent damage from moisture, dirt, and other debris. Mounting brackets also help to protect the antenna from animals, such as birds or squirrels, that may try to perch or nest on it.
Overall, mounting brackets are essential components of antenna installations. They provide stability, help to optimize signal reception, and protect the antenna from environmental factors.
How Do You Mount an Antenna on a Pole?
Here are the steps to mount an antenna on a pole:
1. Select the right bracket type: There are various types of brackets available, such as wall mounts, chimney mounts, and roof mounts. Choose a bracket that is suitable for your specific setup and antenna type.
2. Determine the location: Find a suitable location for the pole, considering factors such as line of sight to the signal source, interference, and accessibility for maintenance.
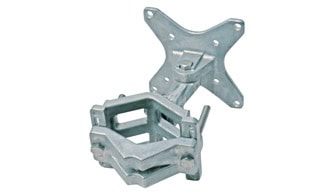
3. Assemble the bracket: Follow the manufacturer’s instructions to assemble the bracket. This typically involves attaching the mounting plate to the pole bracket and securing any necessary hardware.
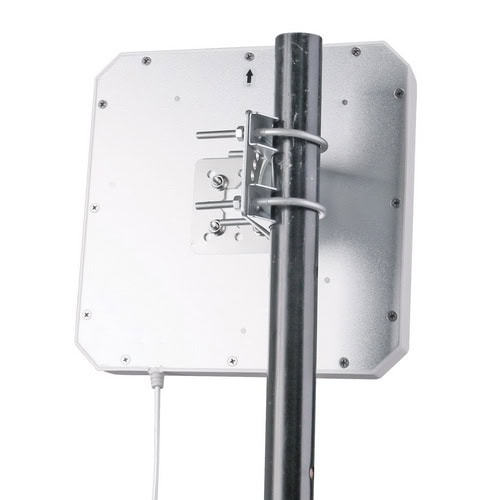
4. Attach the bracket to the pole: Position the bracket at the desired height on the pole and use U-bolts or other appropriate hardware to secure it tightly. Ensure that the bracket is level and properly aligned.
5. Mount the antenna: Attach the antenna to the mounting plate on the bracket using the appropriate hardware. Make sure the antenna is securely fastened and positioned correctly for optimal signal reception.
6. Adjust the antenna: Fine-tune the antenna’s position for the best signal quality. This may involve adjusting the angle, rotation, or height of the antenna. Use a signal strength meter or consult the antenna manufacturer’s instructions to find the optimal position.
7. Secure the antenna cables: Use cable ties or other means to secure the antenna cables to the pole. This will prevent them from being damaged by wind or other environmental factors.
8. Weatherproof the connections: Apply waterproofing materials, such as self-amalgamating tape or silicone sealant, to protect the connections between the antenna and the cables from moisture and corrosion.
9. Test the signal: Once everything is securely mounted, connect the antenna cables to your equipment and test the signal strength and quality. Make any necessary adjustments to improve the signal if needed.
Remember to follow all safety guidelines when working at heights or with electrical equipment. If you are unsure about any step of the process, consult a professional installer or seek advice from the antenna manufacturer.
Galvanized vs. Stainless Steel Straps for Chimney Mounts
When choosing straps for chimney mounts, you’ll typically encounter two main options: galvanized steel and stainless steel. Both are designed to securely anchor your mounting bracket, but there are key differences to consider.
Galvanized steel straps are coated with a layer of zinc to protect against rust. They offer reliable corrosion resistance for most general outdoor environments and tend to be more budget-friendly. However, over time in particularly harsh or coastal conditions, galvanized straps may show signs of rust as the protective coating wears away.
Stainless steel straps, on the other hand, are inherently resistant to rust and corrosion—even in salty, humid, or industrial environments. Brands like BAND-IT and Panduit are well known for their stainless options. While typically more expensive, stainless steel straps offer greater longevity and are ideal for installations where maximum durability is needed.
In summary, for standard residential setups away from corrosive environments, galvanized straps are usually sufficient. For rooftops near the ocean or when you want the peace of mind that comes with superior rust resistance, stainless steel straps are a worthwhile investment.
How to Choose a Mounting Bracket?
Here are some steps to help you choose the right mounting bracket:
1. Determine the weight of your antenna: The first step is to know the weight of your antenna. This information is usually available in the antenna’s specifications. Make sure to choose a mounting bracket that can support the weight of your antenna.
2. Consider the installation environment: Think about where you will be installing the antenna. Will it be indoors or outdoors? Will it be mounted on a wall, a pole, or a roof? The mounting bracket you choose should be suitable for the specific installation environment.
3. Decide on the signal orientation: Determine the direction in which you want the antenna to face. Some mounting brackets allow for easy adjustment of the antenna’s angle and direction, while others are more fixed. Choose a mounting bracket that meets your signal orientation requirements.
4. Check the compatibility with your antenna: Ensure that the mounting bracket is compatible with your antenna model. Different antennas have different mounting requirements, so it’s important to choose a bracket that matches your antenna’s specifications.
5. Consider durability and flexibility: Look for a mounting bracket that is durable and made of high-quality materials. It should be able to withstand outdoor conditions, such as wind, rain, and extreme temperatures. Additionally, consider how flexible the bracket is in terms of adjustments and positioning.
6. Ease of installation: Lastly, consider how easy it is to install the mounting bracket. Some brackets may require professional installation, while others can be easily installed by yourself. Choose a bracket that matches your level of expertise and the tools you have available.
By considering these factors, you can choose a mounting bracket that is the right fit for your antenna and installation requirements.
What is the Difference Between Wall Mount and Mast Mount?
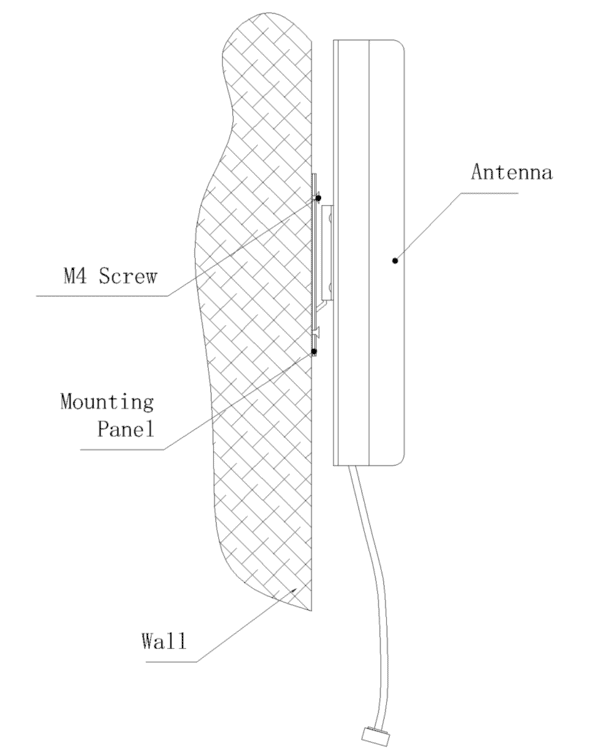
Wall mounts are brackets that are designed to be attached to stable, vertical surfaces such as walls or poles. They provide a secure and sturdy base for mounting antennas, but their positioning options are limited to the location of the wall or pole.
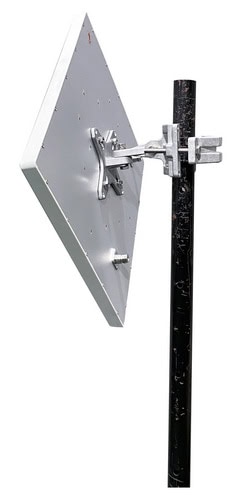
Mast mounts, on the other hand, are brackets that are designed to be attached to a mast or pole. They offer more flexibility in positioning because they can be installed on a mast that can be placed in various locations. This is especially useful in open spaces where there may not be a suitable vertical surface for wall mounting.
Overall, the main difference between wall mounts and mast mounts is their positioning options. Wall mounts are ideal for stable, vertical surfaces, while mast mounts offer more flexibility in positioning, especially in open spaces.
What Sizes and Configurations Are Available for Wall and Boxed Mast Mounts?
When it comes to selecting wall and boxed mast mounts for your antenna installation, there are several sizes and configurations to suit various needs:
- Wall Mount Brackets: These typically come in a range of sizes, including compact 4-inch mounts ideal for lightweight antennas and larger 12-inch or 24-inch brackets for scenarios where increased clearance or additional stability is needed. Some wall mounts are designed to accept pipes up to 2 inches in diameter, providing flexibility based on your specific antenna hardware.
- Boxed Mast Mounts: For situations that require more robust support, boxed mast mounts are available in multiple lengths, such as 12-inch, 18-inch, and 24-inch versions. Many of these configurations include extra leg support—often a third leg—for added stability, which can be especially valuable in windy or exposed locations.
- Adjustable Options: Both wall and boxed mast mounts often offer adjustable features, like compatibility with different pole diameters (commonly ranging from 1 to 4 inches). This makes it easy to find a mount suited to your antenna’s specifications and the installation environment.
Depending on your location and stock availability, you’ll find these various sizes and features make it straightforward to choose a mounting solution that provides the strength and flexibility needed for a reliable installation.
Can You Mount an Antenna?
Some factors to consider when mounting an antenna include the height and direction of the antenna, the type of antenna being used, any obstructions that may affect signal strength, and local regulations or restrictions on antenna installation. It is also important to ensure the antenna is securely mounted to withstand wind and weather conditions.
When mounting an antenna on a roof, it is recommended to use a mast or pole to elevate the antenna above any obstructions. Attic installations are an option if there is sufficient signal strength in the area, but it is important to consider any metal or other materials in the attic that may interfere with the signal.
Wall-mounted antennas are typically used for indoor installations or in situations where a roof or attic installation is not possible. Ground-mounted antennas are often used for outdoor installations, such as for satellite dishes or long-range wireless communication.
In summary, antennas can be mounted in various locations depending on the specific needs of the installation. It is important to choose the right mounting strategy and bracket to ensure optimal signal reception and system performance.
In short, selecting the right mounting bracket is crucial for any antenna installation, ensuring not just stability but also optimal performance. Whether you’re a technician, engineer, or a DIY enthusiast, understanding the basics of antenna mounting can significantly impact your project’s success. Engage with us further for more insights and guidance on your antenna setup needs.